The MIDI Biodata sonification device (also known as MIDI Sprout, by DataGarden) is a great device to make music using plants.
Here I describe how to apply the firmware of the very similar Biodata Sonification Arduino shield to a „classic“ MIDI Sprout. This includes adding a button to gain access to a settings menu which allows to adjust MIDI-Channel, LED brightness, note scale and finally the good old threshold.
Sam Cusumano, creator of the MIDI Sprout gave me the idea (or challenge?) to do this:
„And if you REALLY wanna get funky, you can add a button to A1/gnd and use my new codebase which allows users to edit MIDI channel, scale, led brightness, threshold through a ‚menu system‘ using the leds and the knob. check it out on my github https://github.com/electricityforprogress/BiodataSonificationBreadboardKit which is an ‚arduino shield‘ but should work with the main biodata board with perhaps a few code tweaks.“
Modification
Two ways of applying this mod are shown here. On the left side you see the instructions for solderless application. I recommend using the soldered version, but you can easily try it out solderless first. If you don’t have a soldering iron yourself, maybe you know someone who could do this for you.
Materials and tools required
| solderless | soldered |
| – ICSP programmer (i.e. USBASP) – 6x male-to-female dupont/jumper wires – 2x male-to-male dupont/jumper wires (used as button) |
– ICSP programmer (i.e. USBASP) – 8x female-to-female dupont/jumper wires – 6x male pin headers – 1x button |
You’ll also need the AVR toolchain installed to upload a new sketch to the microcontroller. See these tutorials on how to install it.
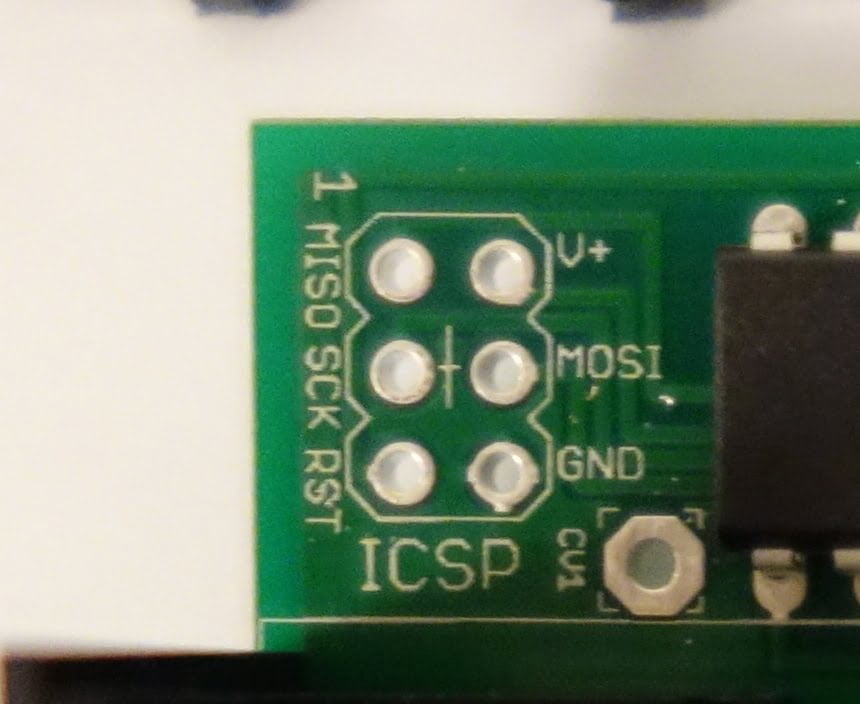
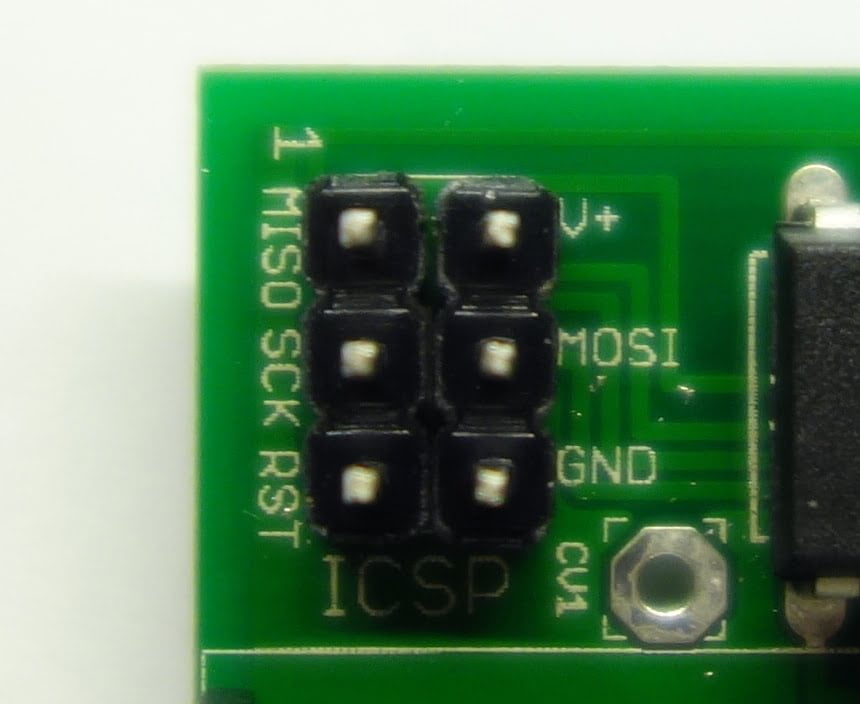
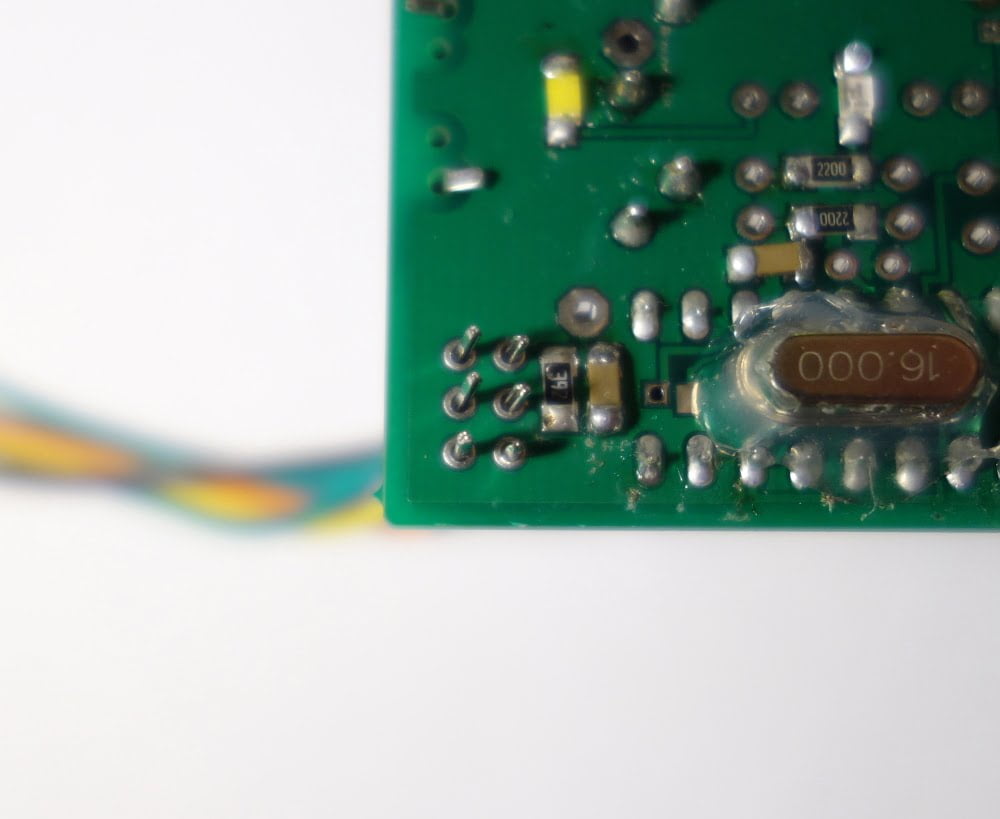
1. ICSP Header
Most MIDI-Sprouts come without the ICSP header as its not required for normal use. We’ll also use it to connect the button afterwards, so its worth soldering it now!
|
|
OR |
|
|
|
|
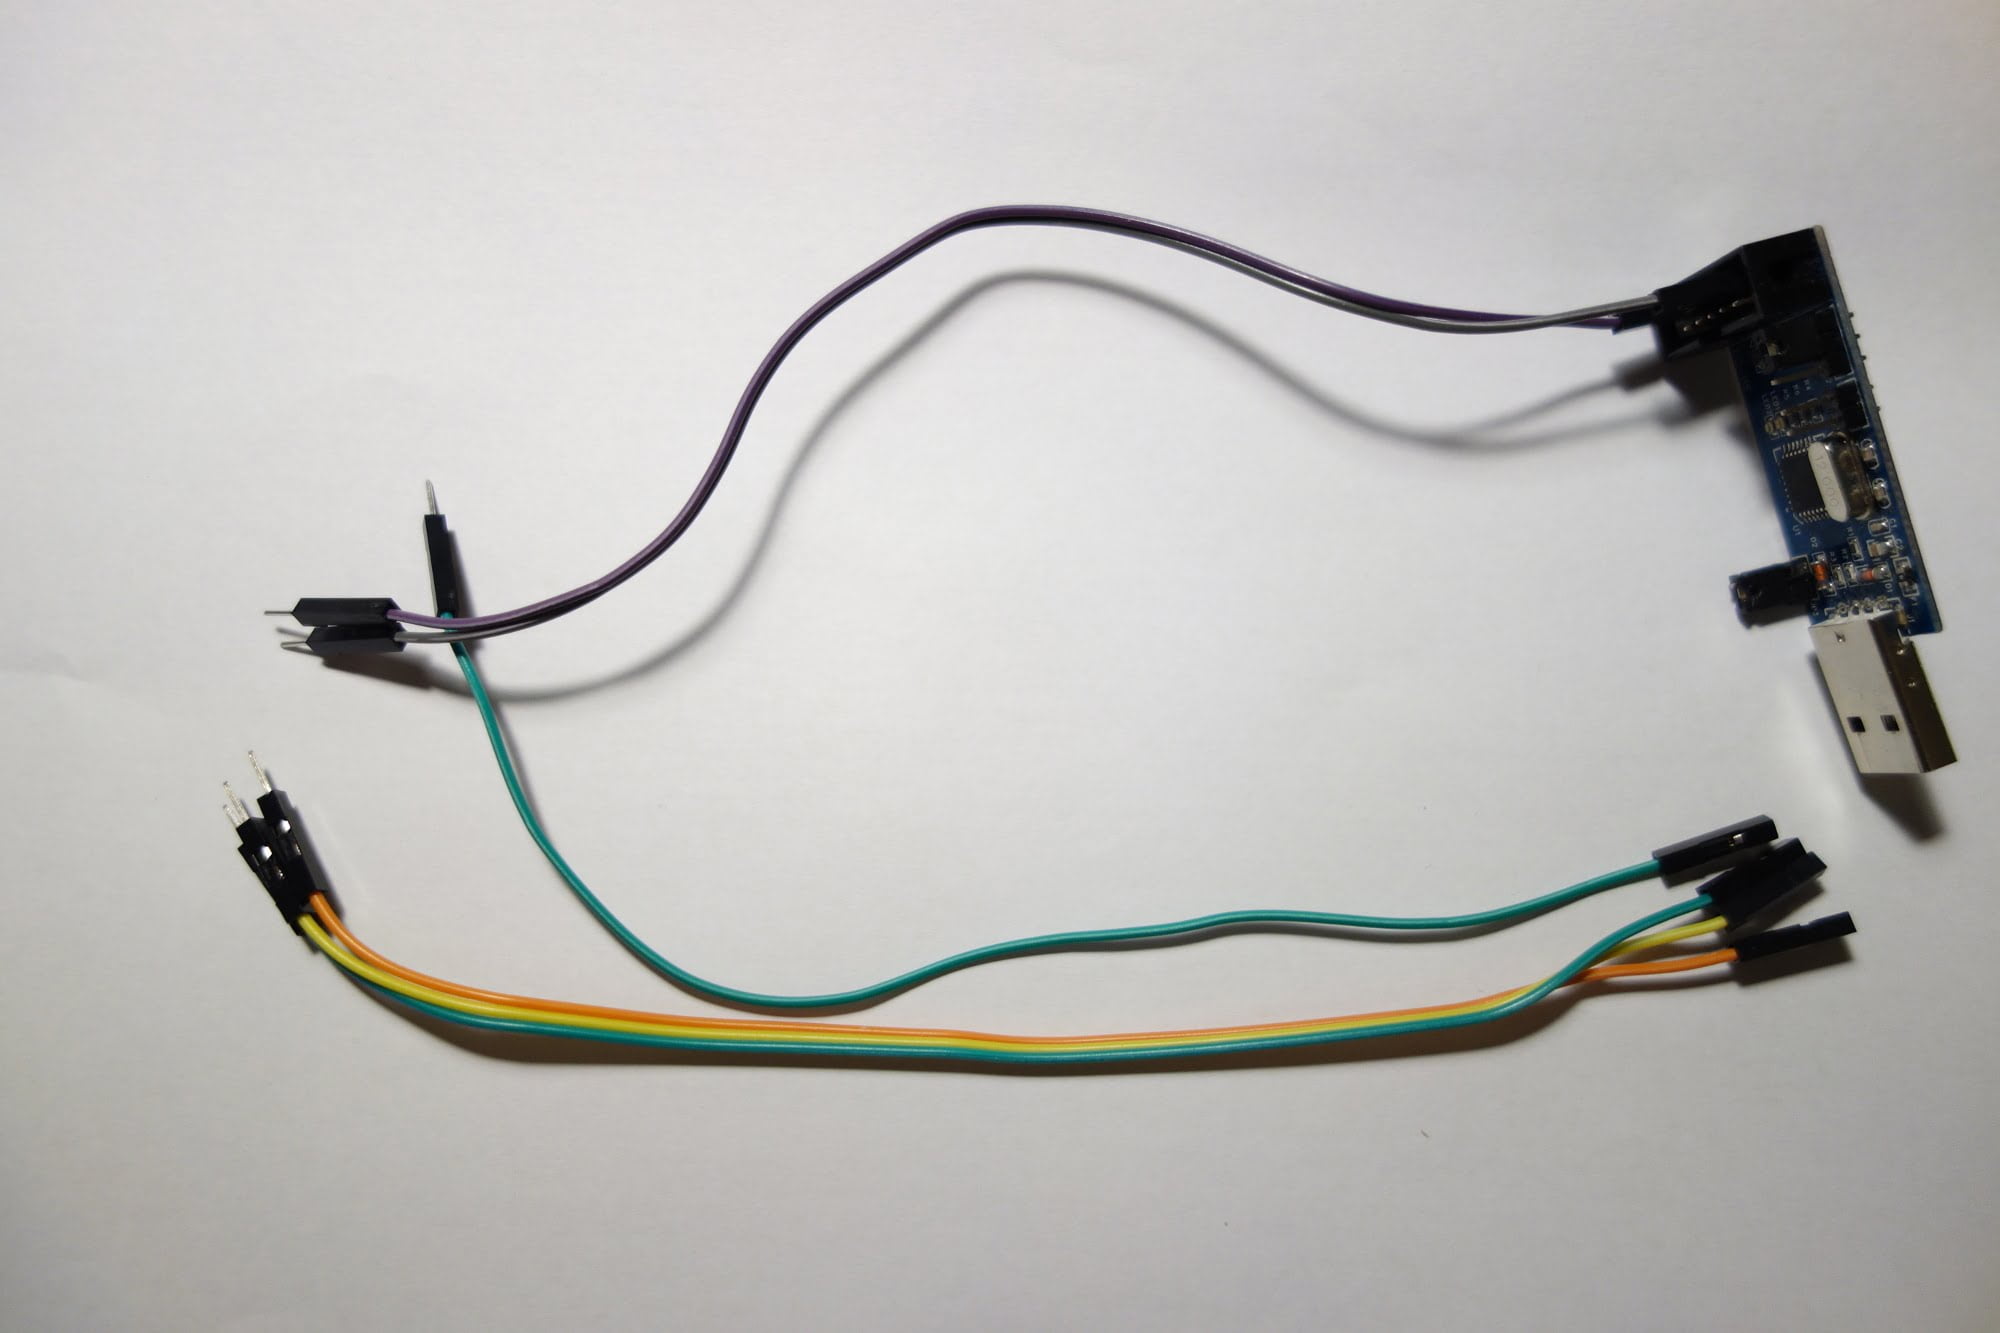
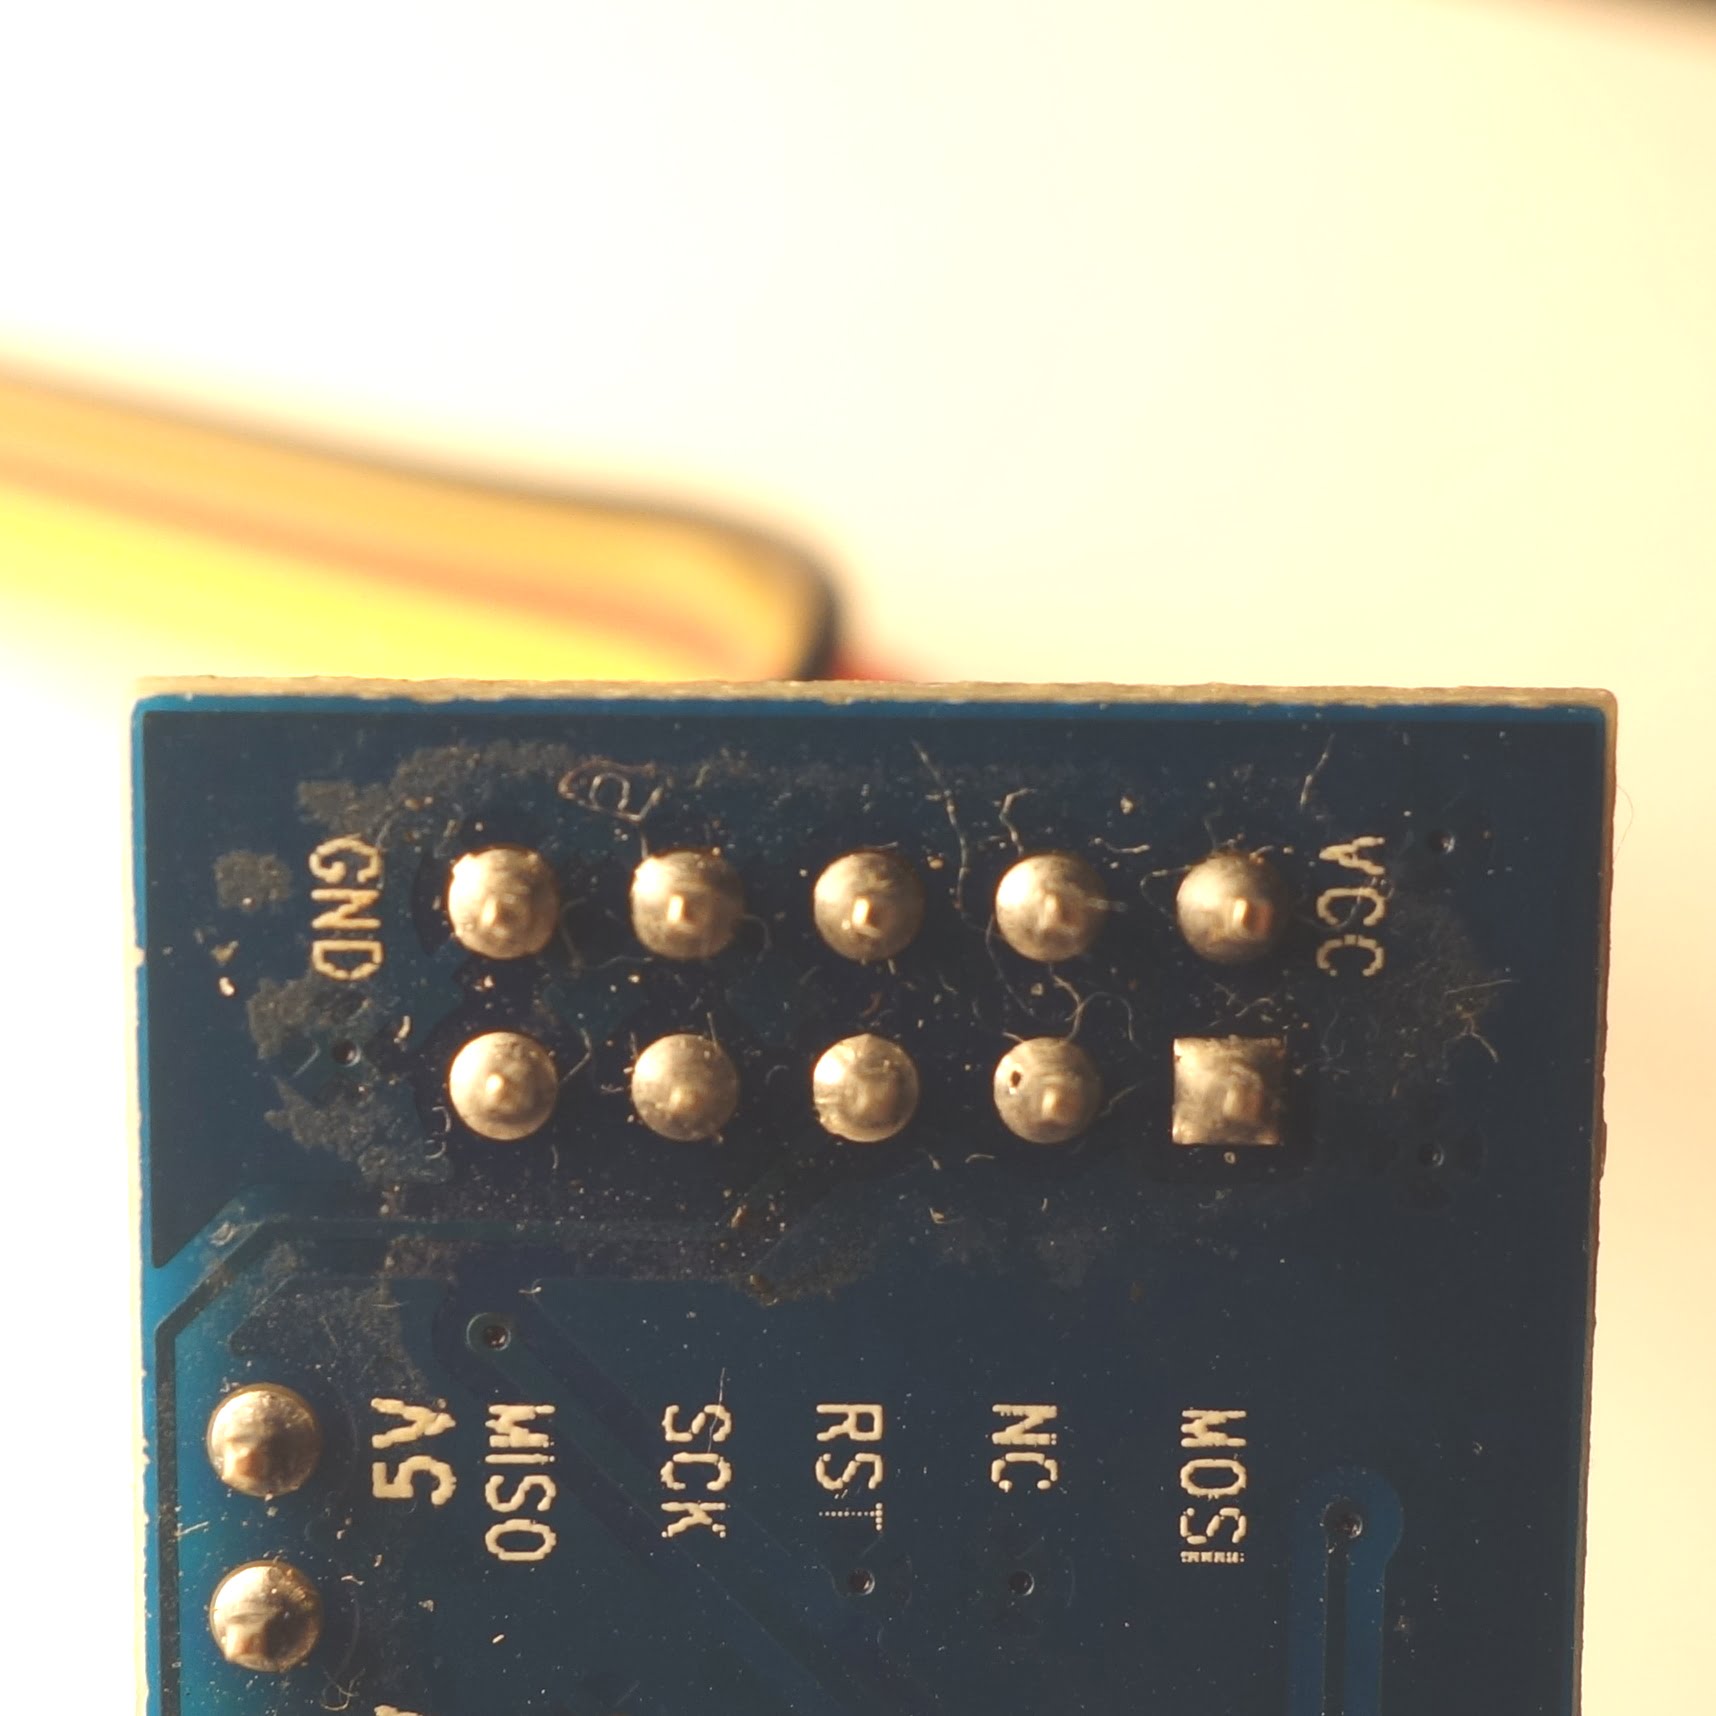
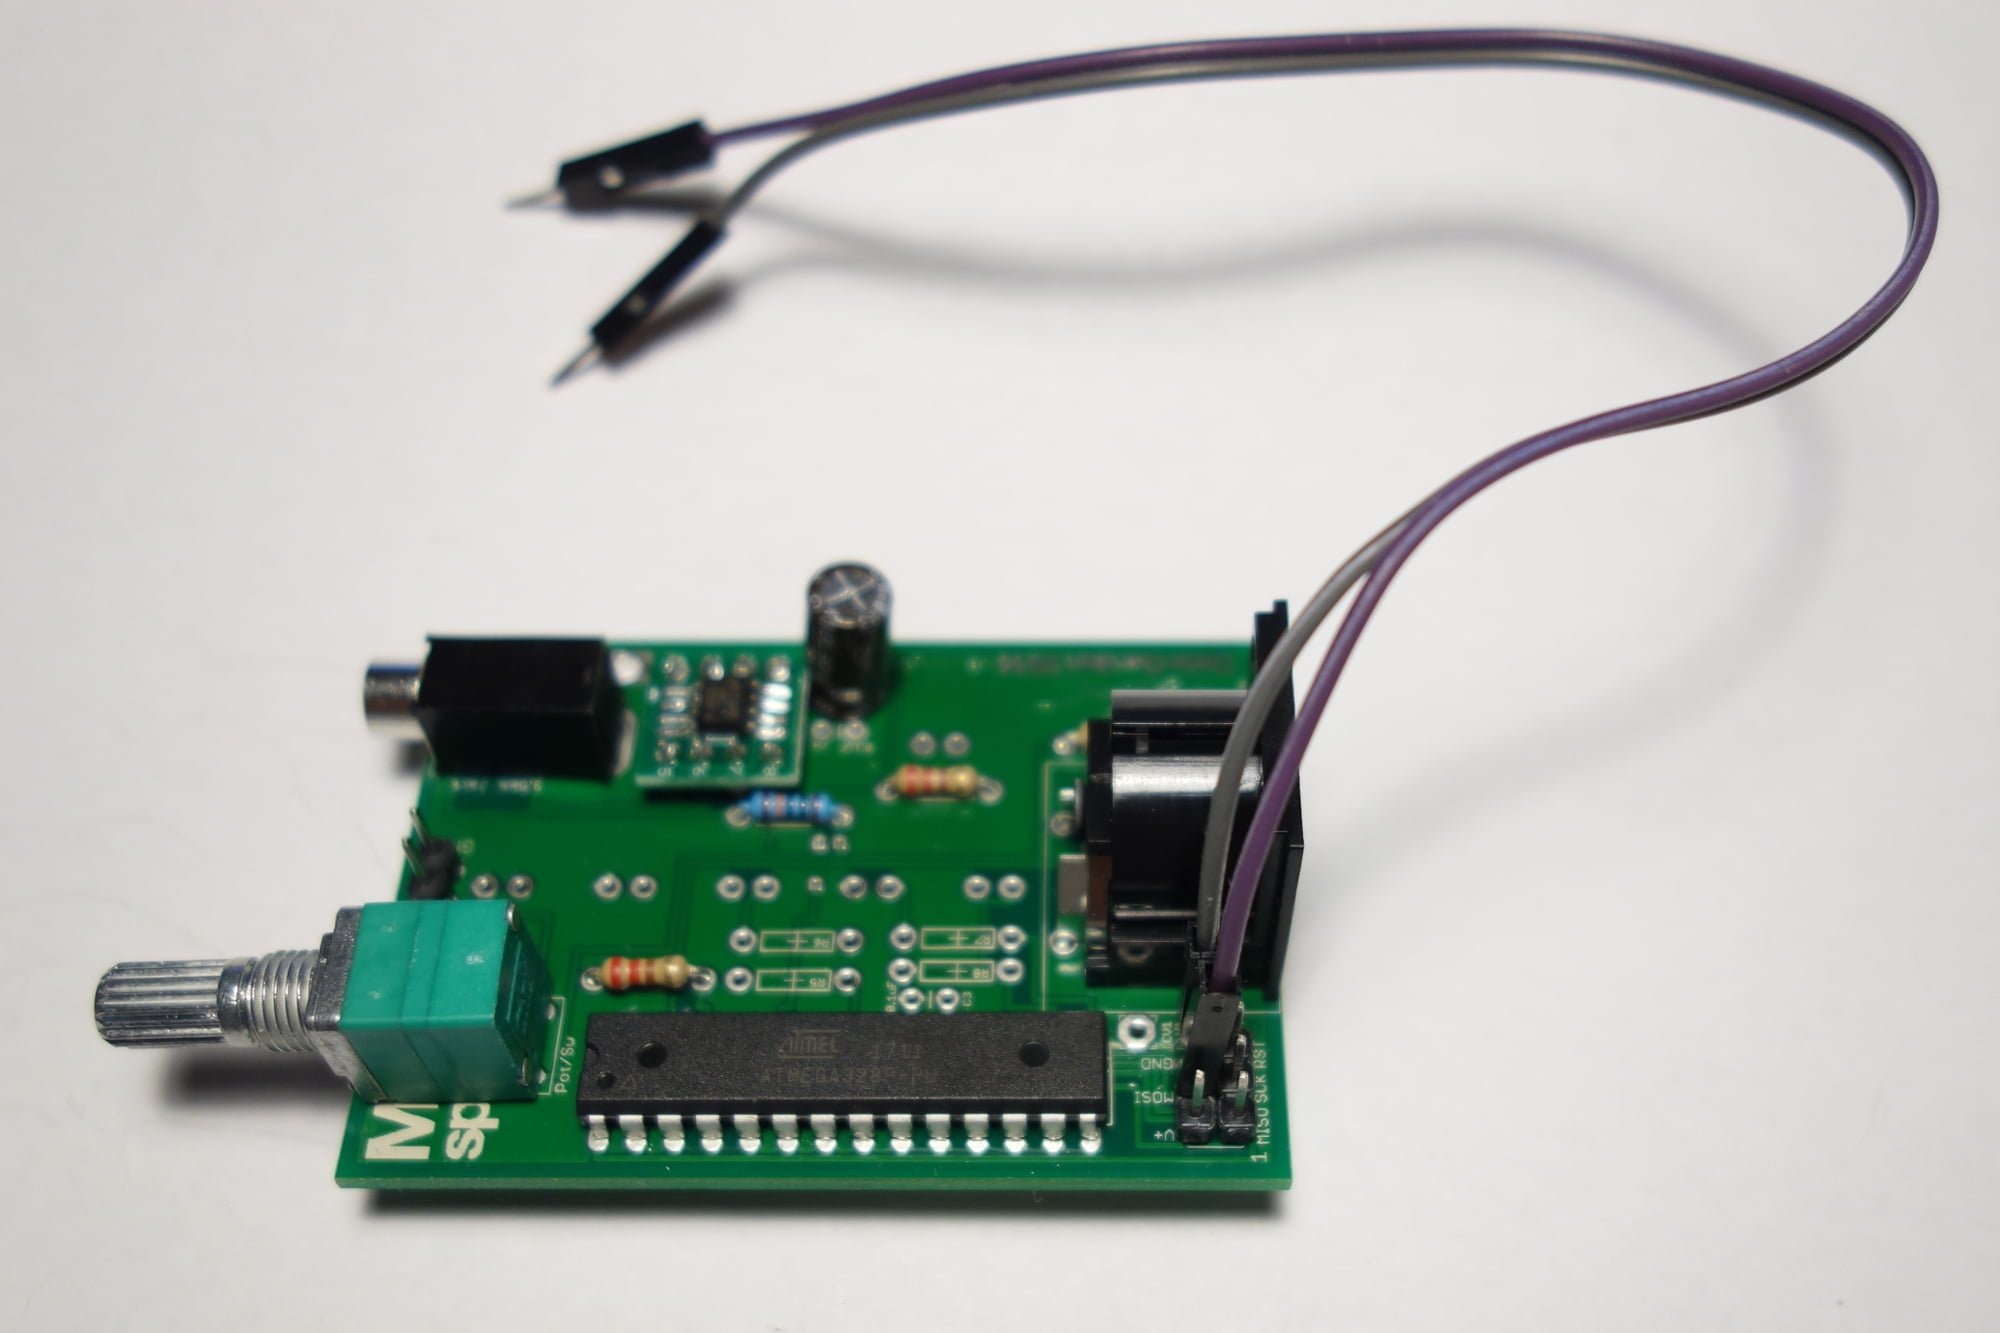
2. Connect ICSP programmer
This step depends on the programmer you’re using. Images are for reference only.
|
|
OR |
|

3. Upload new sketch
Connect your ISP programmer to your computer and upload the pre-compiled hex-file from here:

$ avrdude -c usbasp -p atmega328p -U flash:w:BiodataSonification_MOD.hex
This is the full firmware of the Arduino Shield. Only the pin button is changed to SCK instead of A1.
4. Connect button
Disconnect your ISP programmer and connect a button between SCK and GND of the ICSP connector. (Wiring is not correct in these images!)
|
|
OR |
|

5. You’re done.
Check the usage instructions to see how the new menu works!
If you want to restore the original firmware:
Usage Instructions
To enter the menu, press the button once. One of the LEDs starts flashing. This first menu times out after 5 seconds when you don’t move the knob.
By turning the knob, you can select a setting you want to change (see table below). Press the button again to enter the selected mode.
While adjusting the setting, the MIDI output will continue to work, so you get immediate feedback of changes. Press button again to leave the menu. Once you entered a mode, there is no timeout.
| Threshold | Sensitivity for the electrodes. Moving the pot away from the off-position will decrease the sensitivity. LEDs do normal effects during adjustment. |
|
| Note scale | Chromatic, Major, Diatonic Minor, Indian and Minor scale (white) available. The corresponding LED flashes after entering this setting and the scale can be selected using the knob. Press button to apply and leave the menu. | |
| MIDI Channel | Select MIDI-Channel 1-16 by turning the knob. You’ll need MIDI equipment connected to see changes. No LED effects. | |
| LED Brightness | Select LED effects brightness. From zero to full by using the knob. Blue LED is flashing to indicate the selected brightness. |
All settings are stored in the EEPROM.
Update
now available as ready-made product or DIY kit: